Restore my backups on a new server
Published on January 20, 2025
By Datashelter Team
3 min read
In case of a major incident, you may need to restore your Datashelter backups on a new server. This tutorial provides a step-by-step guide to restoring your file and database backups on the new machine.
- Install snaper on your new server
- Configure snaper with new credentials
- Initiate the actual restoration of your backups
💡Reminder: Snaper allows you to recover your file and database backups. You must first ensure that your applications are reinstalled on the new server (such as MySQL or Nginx) before following this tutorial.
Install snaper on your new server
First, we need to install snaper on the new machine. To do this, simply run the following command (as described in the documentation):
curl -sSL https://dl.datashelter.cloud/scripts/install-snaper.sh | bashIf the operation is successful, you should see an output similar to the following:
root@test-server:~# curl -sSL https://dl.datashelter.cloud/scripts/install-snaper.sh | bash
  % Total    % Received % Xferd  Average Speed   Time    Time     Time  Current
                                 Dload  Upload   Total   Spent    Left  Speed
100 19.0M  100 19.0M    0     0  12.9M      0  0:00:01  0:00:01 --:--:-- 12.9M

snaper version 3.6.4
Configure snaper with new credentials
With snaper now installed on your new server, we will configure it to restore your backups. You have two options:
- You have access to the snaper configuration from the previous server: simply copy the configuration to complete this step.
- You no longer have access to the old configuration: retrieve the credentials from the dashboard.
Option 1: Copy the configuration from the previous server
If you still have access to the previous server, simply transfer the ~/.config/snaper directory to restore your configuration.
This directory contains config.yaml and .encryption_key, which are the two necessary files.
Verify the integrity of your configuration using the following command:
snaper config fetchOption 2: Retrieve credentials from the dashboard
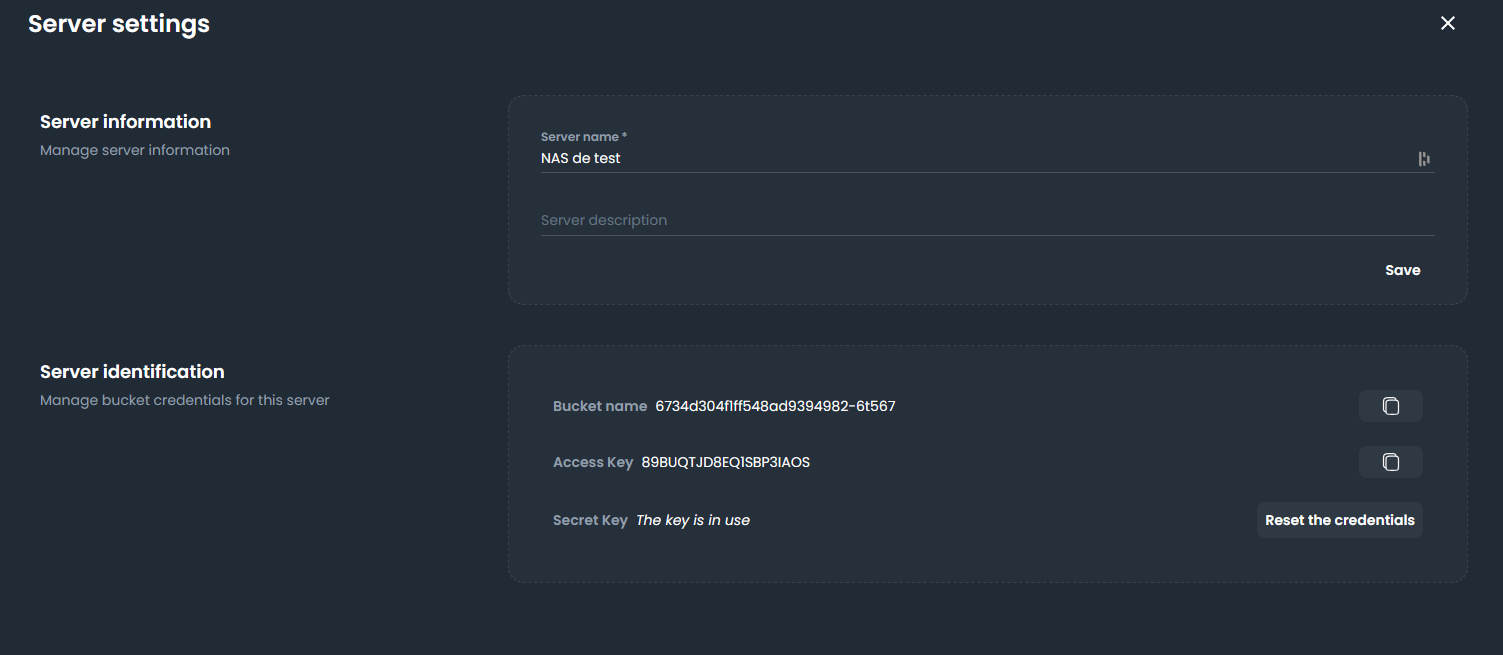
If you no longer have access to the previous server, retrieve the credentials from the dashboard. In the dashboard, navigate to Servers -> Your Server, then click on the small gear icon:
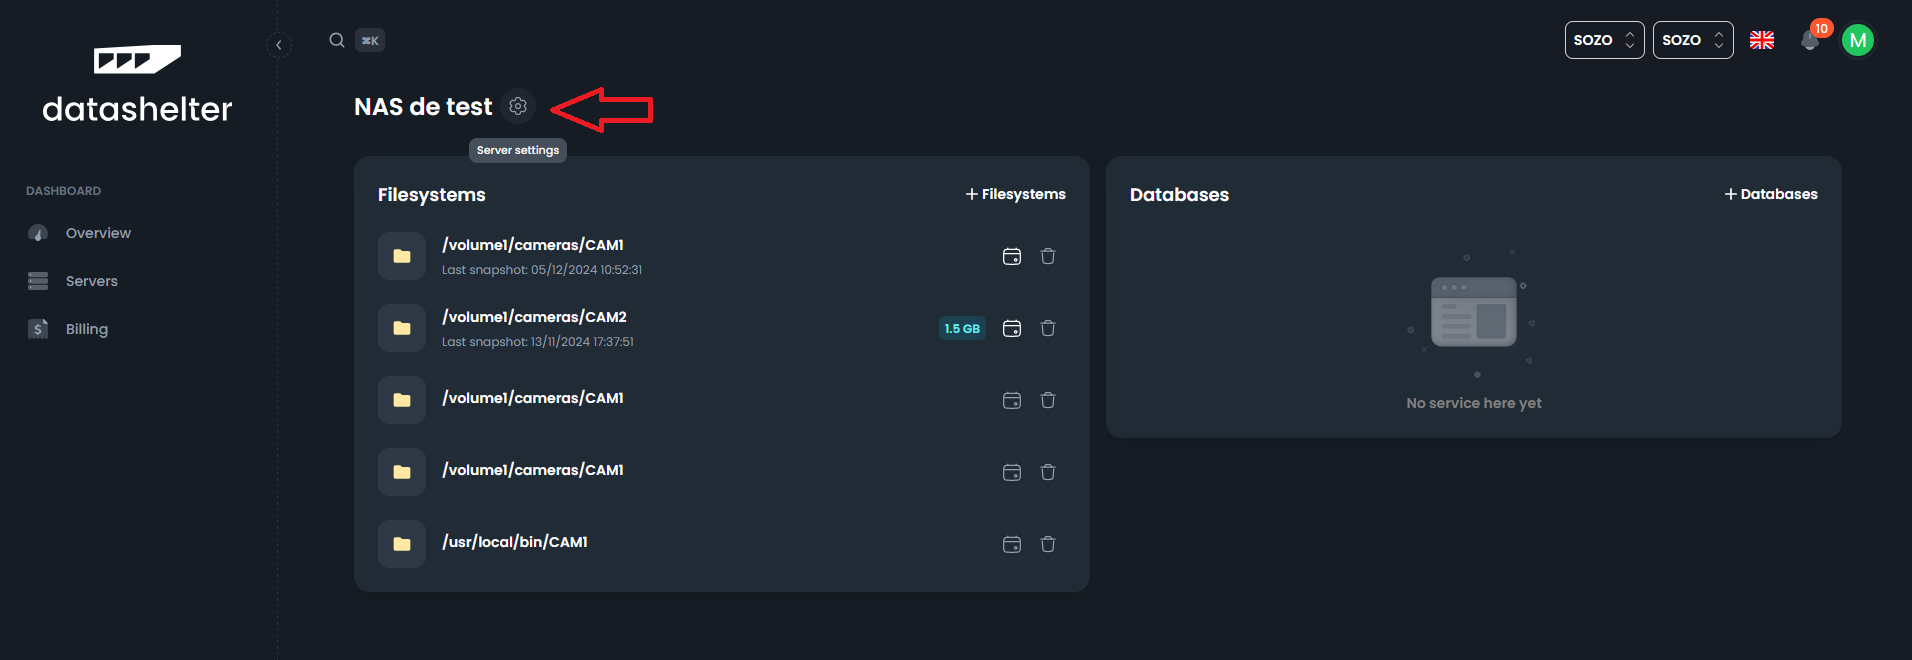
This will display three pieces of information you will need to configure snaper:
- Bucket name:
6734d304f1ff548ad9394982-6t567in our example - Access key:
3FBKN9V0VJ4AUNZZS1XNin our example - Secret key: Click on "Reset credentials" to generate a new one
⚠️The "Reset credentials" button also updates the access key, and the previous credentials will be invalidated.
Server configuration section
Finally, return to your new server's terminal and run the following command:
snaper initYou can accept the suggested parameters except for the three retrieved earlier, which need to be copied and pasted.
Once this step is complete, verify the connection to Datashelter with the following command:
snaper config fetchRestore your backups
We’ve reached the final step: actually restoring your backups. Fortunately, two commands are sufficient to restore all your backups:
snaper restore files --all --latestsnaper restore db --all --latestIf you need more granular control over your restoration (e.g., restoring to a specific date or only certain directories), you can use the dashboard to generate the appropriate restoration commands:
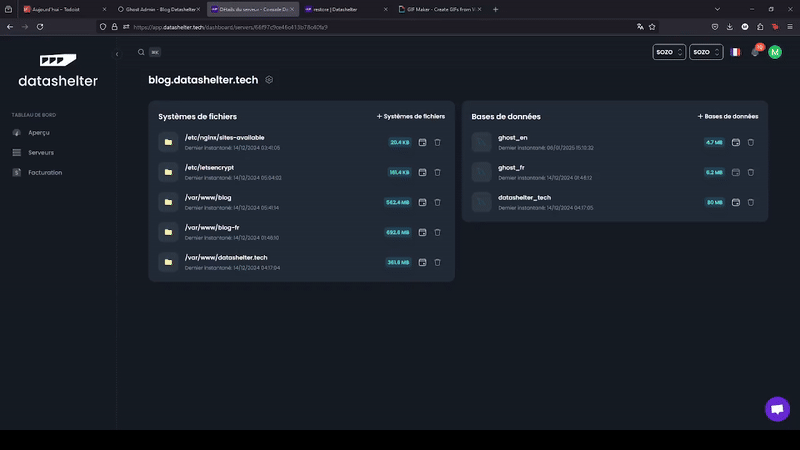
Specific backup restoration
Additionally, our documentation contains more examples of restoration commands tailored to your specific needs.
If needed, our support team is available at support@datashelter.tech or via the chatbot in the bottom-right corner of your interface.